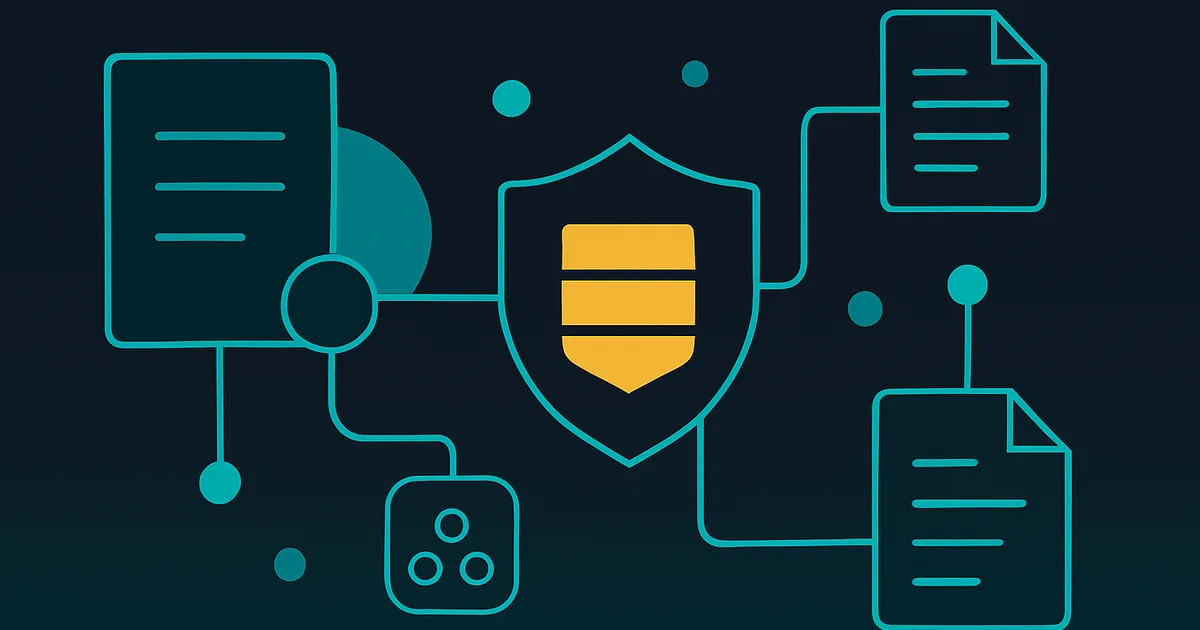
What Sensitivity Labels Do in SharePoint and How to Configure Them
Microsoft Purview sensitivity labels classify and protect SharePoint content by applying encryption, access restrictions, visual markings, and governance policies to documents and sites. They are the foundation of Microsoft's information protection architecture and the modern replacement for Azure Information Protection, enabling organizations to control who can access sensitive content regardless of where it travels.

In our 25+ years of deploying SharePoint security solutions for regulated industries, we have implemented sensitivity label frameworks for healthcare organizations protecting PHI, financial institutions safeguarding trading data, and government agencies classifying national security information. This guide covers label taxonomy design, encryption configuration, auto-labeling, DLP integration, and container labels for SharePoint sites. Sensitivity labels work in concert with the underlying SharePoint permission model — for the permission baseline every label rollout depends on, review our SharePoint permissions and security complete guide.
Understanding the Two Types of Sensitivity Labels
Sensitivity labels work in two distinct ways in SharePoint. Item-level labels are applied to individual documents and can encrypt the file, add visual markings such as headers, footers, and watermarks, and restrict who can open it. Container labels are applied to the SharePoint site itself or the associated Microsoft 365 Group and control site access, external sharing permissions, and unmanaged device access but do not encrypt individual documents.
Many organizations configure only item labels and discover that their SharePoint sites are not protected at the container level. A comprehensive sensitivity label strategy must address both levels.
Designing Your Label Taxonomy
Simple Four-Label Taxonomy
For most organizations, a four-label taxonomy provides adequate protection without overwhelming users. The labels are Public for content safe for external distribution, Internal for standard business content restricted to organization members, Confidential for sensitive business content restricted to specific groups, and Highly Confidential for the most sensitive content with encryption and strict access controls.
Industry-Specific Extensions
Healthcare organizations typically add a PHI label that enforces encryption, restricts access to clinical staff, enables auto-labeling for documents containing SSN and medical record number patterns, and integrates with DLP policies that block external sharing. Financial services firms add labels for Trading Data, Client Financials, and Regulatory Submissions with corresponding encryption and access restrictions.
Configuring Item-Level Labels
Encryption Settings
For Confidential and Highly Confidential labels, configure encryption to restrict access to specific Azure AD groups. Define whether recipients can forward, copy, or print content. Set content expiration dates for time-sensitive materials. Choose between user-assigned permissions or administrator-defined permissions.
Visual Markings
Configure headers, footers, and watermarks that appear on labeled documents. Visual markings serve as a reminder to users that content is classified and should be handled appropriately. They also provide evidence of classification when documents are printed or screenshotted.
Auto-Labeling Policies
Auto-labeling automatically applies sensitivity labels to documents based on content analysis. Configure auto-labeling rules that detect credit card numbers, Social Security numbers, medical record numbers, financial account numbers, and custom patterns specific to your organization.
Auto-labeling can operate in two modes. Client-side auto-labeling recommends a label to the user while they are editing a document. Service-side auto-labeling applies labels automatically to documents at rest in SharePoint libraries without user interaction.
Configuring Container Labels
Container labels protect SharePoint sites and Microsoft 365 Groups at the boundary level. When you apply a container label to a site, it can restrict external sharing to a specific level, require or block unmanaged device access, set the site privacy to public or private, and configure a default sharing link type.
```powershell
# View sensitivity labels available for sites
Connect-IPPSSession
Get-Label | Where-Object { $_.ContentType -contains "Site, UnifiedGroup" } |
Select-Object DisplayName, Guid, Priority
```
DLP Integration with Sensitivity Labels
Data Loss Prevention policies can reference sensitivity labels as conditions. Create DLP policies that block external sharing of documents labeled Highly Confidential, require justification for sharing Confidential documents outside the organization, alert compliance officers when PHI-labeled documents are accessed by non-clinical users, and prevent labeled documents from being uploaded to non-Microsoft cloud services.
The combination of sensitivity labels and DLP policies creates a defense-in-depth approach where labels classify content and DLP policies enforce behavioral restrictions based on those classifications.
User Adoption and Training
Sensitivity labels only work if users apply them consistently. Mandate labeling by configuring label policies that require users to select a label before saving documents. Set default labels on SharePoint libraries so documents inherit classification automatically. Train users on what each label means and when to apply it using practical examples from their daily work.
Measure labeling compliance through Microsoft Purview reports that show labeling activity, unlabeled content, and label distribution across your environment. Address low-adoption areas with targeted training and management reinforcement.
Label Analytics and Monitoring
Use Microsoft Purview content explorer and activity explorer to monitor label usage across your SharePoint environment. Track which labels are most frequently applied, which sites have the highest concentration of sensitive content, whether auto-labeling is correctly identifying sensitive documents, and whether users are downgrading labels inappropriately.
Configure alerts for label downgrades on highly sensitive content, which could indicate policy bypass attempts or user confusion about classification requirements.
Migration from Azure Information Protection
Organizations transitioning from Azure Information Protection to Microsoft Purview sensitivity labels should inventory existing AIP labels and protection templates, create equivalent sensitivity labels in the Purview compliance portal, configure label migration settings to convert AIP labels to Purview labels on documents, and validate that protection settings are maintained after migration.
Governance and Lifecycle Management
Establish a sensitivity label governance committee that includes representatives from IT security, compliance, legal, and business units. This committee reviews and approves new labels, evaluates label effectiveness quarterly, adjusts auto-labeling rules based on false positive rates, and retires unused labels to keep the taxonomy manageable.
Auto-Labeling for Scalable Classification
Manual labeling relies on users to correctly classify every document they create or upload, which inevitably results in inconsistent classification across the organization. Auto-labeling policies in Microsoft Purview scan document content for sensitive information patterns and automatically apply the appropriate sensitivity label without user intervention. Configure auto-labeling to detect common sensitive data types including social security numbers, credit card numbers, medical record numbers, and financial account identifiers. For industry-specific content, create custom sensitive information types that detect patterns unique to your organization such as internal project codes, patient identifiers, or proprietary classification markings. Start auto-labeling in simulation mode to evaluate accuracy before enabling enforcement, and continuously refine the detection rules based on false positive and false negative rates observed in production.
Sensitivity Labels for SharePoint Sites and Teams
Container-level sensitivity labels applied to SharePoint sites and Microsoft Teams enforce baseline security settings on the entire container rather than individual documents. A site labeled as Confidential can enforce private site access, block external sharing, require managed devices for access, and set a default sensitivity label for all documents created within the site. This container-level protection complements document-level labels by establishing a security baseline that applies even to documents that users fail to label individually. Design your label taxonomy with both document and container labels in mind, ensuring that the protections applied at each level work together coherently rather than creating conflicts or gaps.
Our SharePoint consulting team designs and implements sensitivity label frameworks for regulated industries. We handle taxonomy design, encryption configuration, auto-labeling policies, DLP integration, and user training. Contact us for a sensitivity label assessment and implementation plan.
Advanced Label Scenarios for Enterprise Environments
Double Key Encryption for Highly Sensitive Content
For organizations that require absolute control over encryption keys, Microsoft Purview supports Double Key Encryption (DKE) with sensitivity labels. DKE uses two keys to protect content: one held by Microsoft and one held by your organization. Neither party can decrypt the content independently. This is critical for defense contractors, intelligence agencies, and organizations that must maintain sovereign control over their encryption keys.
Configure DKE labels for your most sensitive content categories. Be aware that DKE-protected documents have limited functionality: they can only be opened in certain Office applications and do not support co-authoring or some online viewing scenarios. Reserve DKE for content where the security requirement justifies the functionality tradeoff.
Label Priority and Conflict Resolution
When multiple auto-labeling policies match a single document, SharePoint applies the label with the highest priority (lowest number). Design your label priority order carefully so that more sensitive labels take precedence. A document containing both internal financial data and PHI should receive the PHI label if it has higher priority than the financial data label.
Test auto-labeling policies in simulation mode before enabling enforcement. Simulation mode shows which documents would receive labels without actually applying them. Review the simulation results to identify false positives and false negatives, then adjust your rules before activating enforcement.
Sensitivity Labels for SharePoint Lists
In addition to documents, sensitivity labels can be applied to SharePoint lists to protect structured data. A list containing employee performance reviews, customer financial data, or patient information can be labeled to restrict access, prevent external sharing, and enforce retention policies. Configure list-level labels through the Microsoft Purview compliance portal.
Operationalizing Sensitivity Labels
End-User Training Program
Design a training program that teaches users to classify content accurately. Include hands-on exercises where users practice applying labels to sample documents. Create a decision tree poster or quick-reference card that guides users through the label selection process based on content characteristics. Test user comprehension with scenarios and provide feedback.
Measure training effectiveness by tracking labeling accuracy rates after training. If users consistently misclassify content, revise the training materials and simplify the label taxonomy. A taxonomy that users cannot apply correctly is worse than no taxonomy because it creates a false sense of security.
Incident Response for Label Violations
Define incident response procedures for sensitivity label violations including unauthorized label downgrades, attempts to share labeled content externally, and removal of labels from protected documents. Configure Microsoft Purview alerts that trigger when these violations occur. Route alerts to the security operations team for investigation. Document the investigation process and remediation steps.
Integration with Microsoft Defender
Microsoft Defender for Cloud Apps can enforce sensitivity label policies on content shared through cloud applications. Configure session policies that prevent uploading of highly confidential labeled documents to non-Microsoft cloud storage, that require labeling before allowing downloads from monitored cloud apps, and that block sharing of sensitive labeled content through unapproved communication channels.
Label Lifecycle Management
Plan for label evolution. As organizational needs change, you may need to add new labels, modify existing labels, or deprecate unused labels. When modifying a published label, understand the impact on all previously labeled documents. When deprecating a label, migrate affected documents to a replacement label before removing the deprecated label from the policy. Test all label changes in a pilot group before broad deployment.
Enterprise Implementation Best Practices
In our 25+ years of enterprise SharePoint consulting, we have helped hundreds of organizations implement security architectures that satisfy the most demanding regulatory auditors while maintaining the usability that drives adoption. Security implementations that focus exclusively on restriction without considering user experience inevitably fail because users find workarounds that create greater risk than the original exposure.
- Implement Defense in Depth: Never rely on a single security control. Layer your SharePoint security across identity verification with conditional access policies, device compliance requirements through Intune integration, data classification with sensitivity labels, access governance through regular entitlement reviews, and monitoring through unified audit logging. Each layer compensates for potential gaps in the others, creating a security posture that withstands sophisticated threats.
- Deploy Conditional Access Policies Before Expanding Access: Before enabling any new sharing or collaboration features, ensure conditional access policies enforce MFA for all external access, block sign-ins from high-risk locations, require compliant devices for downloading sensitive content, and enforce session timeouts appropriate to your data classification. These policies provide the safety net that allows you to enable productive collaboration features confidently.
- Automate Security Monitoring and Response: Manual security monitoring does not scale. Configure Microsoft Defender alerts for anomalous sharing patterns, bulk download activities, permission escalation events, and access from unusual locations. Integrate these alerts with your security operations workflow so that potential incidents receive immediate attention rather than languishing in unmonitored dashboards.
- Conduct Regular Penetration Testing of SharePoint Configurations: Schedule quarterly security assessments that specifically test your SharePoint configuration against common attack vectors including permission escalation through group nesting, data exfiltration through approved sharing channels, and social engineering through legitimate collaboration features.
- Establish a Security Champions Network: Train representatives from each department to recognize and report security concerns within their SharePoint sites. These champions serve as your first line of defense and dramatically improve incident response times by identifying issues before they escalate.
Governance and Compliance Considerations
Implementing advanced security controls in SharePoint creates compliance obligations that extend beyond technical configuration into policy documentation, audit evidence collection, and regulatory reporting. Organizations must align their SharePoint security architecture with their broader compliance framework to avoid creating gaps that auditors will identify.
For HIPAA-regulated organizations, SharePoint security controls must enforce minimum necessary access to protected health information, maintain comprehensive audit trails of all PHI access, and ensure encryption meets HIPAA standards for data at rest and in transit. Configure Microsoft Purview sensitivity labels to automatically encrypt documents classified as containing PHI and retain access logs for the HIPAA-mandated six-year retention period.
Financial services organizations must demonstrate to regulators that their SharePoint security controls satisfy SOC 2 trust service criteria and industry-specific requirements from SEC, FINRA, and OCC. Map each security control to specific compliance requirements and maintain evidence that controls are operating effectively through automated monitoring and regular testing.
Government agencies and contractors must ensure that SharePoint security configurations comply with FedRAMP authorization requirements, CMMC maturity level controls, and NIST 800-53 security control families. Implement FIPS 140-2 validated encryption and maintain system security plans that document every security configuration decision.
Maintain a compliance control matrix that maps every SharePoint security configuration to its applicable regulatory requirement, testing frequency, and evidence collection method. Review this matrix quarterly and update it when regulations change, new security features become available, or audit findings require remediation. Partner with SharePoint security specialists who maintain current knowledge of both platform capabilities and regulatory requirements to ensure continuous compliance alignment.
Ready to strengthen your SharePoint security posture against evolving threats? Our security specialists have hardened SharePoint environments for Fortune 500 organizations across the most regulated industries. Contact our team for a comprehensive security assessment, and discover how our SharePoint consulting services can implement defense-in-depth controls that satisfy auditors and protect your most sensitive data.
Common Challenges and Solutions
Organizations implementing SharePoint Sensitivity Labels Microsoft Purview consistently encounter obstacles that, if left unaddressed, undermine adoption and erode stakeholder confidence. Drawing on two decades of enterprise SharePoint consulting, these are the challenges we see most frequently and the proven approaches for overcoming them.
Challenge 1: Content Sprawl and Information Architecture Degradation
Over time, SharePoint Sensitivity Labels Microsoft Purview environments accumulate redundant, outdated, and trivial content that degrades search relevance and confuses users. Without proactive content lifecycle management, the signal-to-noise ratio deteriorates and user trust in the platform erodes. The resolution requires a structured approach: establishing automated retention policies that flag content for review after defined periods of inactivity, combined with content owner accountability structures that assign clear responsibility for each site collection and library. Organizations that address this proactively report 40 to 60 percent fewer support tickets within the first 90 days of deployment. Establishing a dedicated governance committee with representatives from IT, compliance, and business stakeholders ensures ongoing alignment between technical configuration and organizational objectives.
Challenge 2: Compliance and Audit Readiness Gaps
SharePoint Sensitivity Labels Microsoft Purview implementations in regulated industries often lack the audit trail depth and policy enforcement rigor required by frameworks such as HIPAA, SOC 2, and GDPR. Retroactive compliance remediation is significantly more expensive and disruptive than building compliance into the initial design. We recommend embedding compliance requirements into the information architecture from day one. Configure Microsoft Purview retention labels, DLP policies, and audit logging before deploying content, and validate compliance posture through regular internal audits. Tracking these metrics through SharePoint health dashboards provides early warning indicators that allow administrators to intervene before minor issues become systemic problems affecting enterprise-wide productivity.
Challenge 3: Inconsistent Governance Across Business Units
When different departments implement SharePoint Sensitivity Labels Microsoft Purview independently, inconsistent naming conventions, metadata schemas, and security configurations create silos that undermine cross-functional collaboration and complicate compliance reporting. The most effective mitigation strategy involves centralizing governance policy definition while allowing controlled flexibility at the departmental level. A hub-and-spoke governance model balances enterprise consistency with departmental autonomy. Enterprises operating in regulated industries such as healthcare and financial services must pay particular attention to this challenge because compliance violations carry significant financial and reputational consequences. Regular audits conducted quarterly at minimum help organizations maintain alignment with evolving regulatory requirements and internal policy updates.
Challenge 4: Migration and Legacy Content Complexity
Organizations transitioning legacy content into SharePoint Sensitivity Labels Microsoft Purview often underestimate the complexity of mapping old structures, metadata, and permissions to modern architectures. Failed migrations erode user confidence and create parallel systems that duplicate effort. Addressing this requires conducting thorough pre-migration content audits that classify and prioritize content based on business value. Invest in automated migration tools that preserve metadata fidelity and permission integrity while providing detailed validation reports. Organizations that invest in structured change management programs achieve adoption rates 35 percent higher than those relying on organic discovery alone. Executive sponsorship combined with department-level champions creates the organizational momentum necessary for sustained success.
Integration with Microsoft 365 Ecosystem
SharePoint Sensitivity Labels Microsoft Purview does not operate in isolation. Its value multiplies when connected to the broader Microsoft 365 ecosystem, creating unified workflows that eliminate context switching and reduce manual data transfer between applications.
Microsoft Teams Integration: Embed SharePoint Sensitivity Labels Microsoft Purview dashboards and document libraries as Teams tabs to create unified workspaces where conversations and structured content management coexist within a single interface. Teams channels automatically provision SharePoint document libraries, which means sharepoint sensitivity labels microsoft purview configurations and content flow seamlessly between collaborative conversations and structured document management. Users can surface SharePoint content directly within Teams tabs, reducing the friction that typically causes adoption to stall.
Power Automate Workflows: Implement scheduled flows that perform routine SharePoint Sensitivity Labels Microsoft Purview maintenance tasks including permission reports, content audits, and usage analytics without requiring manual intervention. Automated workflows triggered by SharePoint events such as document uploads, metadata changes, or approval completions eliminate repetitive manual tasks. Organizations typically automate 15 to 25 processes within the first quarter, saving an average of 8 hours per week per department. These automations also create audit trails that satisfy compliance requirements for regulated industries.
Power BI Analytics: Build executive dashboards that aggregate SharePoint Sensitivity Labels Microsoft Purview metrics alongside other business KPIs, providing a holistic view of digital workplace effectiveness and investment returns. Connecting SharePoint data to Power BI dashboards provides real-time visibility into content usage patterns, adoption metrics, and operational KPIs. Decision makers gain actionable intelligence without requiring manual report generation, enabling faster response to emerging trends and potential issues.
Microsoft Purview and Compliance: Implement retention policies that automatically manage SharePoint Sensitivity Labels Microsoft Purview content lifecycle, preserving business-critical records for required periods while disposing of transient content to reduce storage costs and compliance exposure. Sensitivity labels, data loss prevention policies, and retention schedules configured in Microsoft Purview extend automatically to sharepoint sensitivity labels microsoft purview content. This unified compliance framework ensures that governance policies apply consistently across the entire Microsoft 365 environment rather than requiring separate configuration for each workload. For organizations subject to HIPAA, SOC 2, or FedRAMP requirements, this integrated approach significantly reduces compliance management overhead.
Getting Started: Next Steps
Implementing SharePoint Sensitivity Labels Microsoft Purview effectively requires more than technical configuration. It demands a strategic approach grounded in your organization's specific business requirements, compliance obligations, and growth trajectory. The difference between a deployment that delivers measurable ROI and one that becomes shelfware often comes down to the quality of upfront planning and expert guidance.
Begin with a focused assessment of your current SharePoint environment. Evaluate your existing information architecture, permission structures, content lifecycle policies, and user adoption patterns. Identify gaps between your current state and the target state required for successful sharepoint sensitivity labels microsoft purview implementation. This assessment typically takes 2 to 4 weeks and produces a prioritized roadmap that aligns technical work with business outcomes.
Our SharePoint specialists have guided organizations across healthcare, financial services, government, and education through hundreds of successful implementations. We bring deep expertise in SharePoint architecture, governance frameworks, and compliance alignment that accelerates time to value while minimizing risk.
Ready to move forward? Contact our team for a complimentary consultation. We will assess your environment, identify quick wins, and develop a phased implementation plan tailored to your organization's needs and timeline. Whether you are starting from scratch or optimizing an existing deployment, our enterprise SharePoint consultants deliver the expertise and accountability that Fortune 500 organizations demand.
Written by the SharePoint Support Team
Senior SharePoint Consultants | 25+ Years Microsoft Ecosystem Experience
Our senior SharePoint consultants bring deep expertise spanning 500+ enterprise migrations and compliance implementations across HIPAA, SOC 2, and FedRAMP environments. We cover SharePoint Online, Microsoft 365, migrations, Copilot readiness, and large-scale governance.
Expert SharePoint Services
Frequently Asked Questions
What are the most common SharePoint security vulnerabilities?▼
How do we prevent data leaks through SharePoint external sharing?▼
What SharePoint security features are included with Microsoft 365 E5?▼
How do we audit who accessed sensitive documents in SharePoint?▼
Is SharePoint Online HIPAA compliant out of the box?▼
Need Expert Help?
Our SharePoint consultants are ready to help you implement these strategies in your organization.
Continue Reading in Security
SharePoint Security Hardening: Protect Your Enterprise...
Comprehensive security guide covering permissions, external sharing, sensitivity labels, and advanced threat protection.
SecuritySharePoint Backup and Recovery: Enterprise Protection Guide
Protect your SharePoint data with comprehensive backup and recovery strategies. Learn about native tools, third-party solutions, and disaster recovery planning.
SecuritySharePoint External Sharing: Secure Collaboration Guide
Enable secure external collaboration in SharePoint while maintaining governance and compliance. Learn sharing policies, guest access, and security best practices.
SecuritySharePoint Extranet Setup Guide: Secure External...
Complete guide to setting up a SharePoint extranet for clients, vendors, and partners. Covers architecture options, security controls, permissions, and governance for B2B collaboration.
SecuritySharePoint Permissions Management
Master SharePoint permissions with this enterprise guide. Covers permission levels, inheritance, groups, unique permissions, broken inheritance risks, auditing, and modern best practices.
SecuritySharePoint External Sharing & Guest Access
Securely configure SharePoint external sharing and guest access for enterprise collaboration. Learn sharing policies, guest user management, conditional access, auditing external activity, and compliance controls.